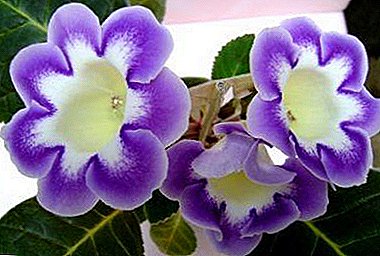
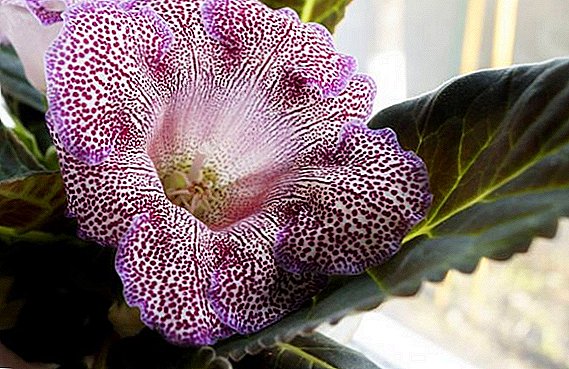
Gloxinia - a popular houseplant with beautiful large flowers. To maintain its decorativeness, constant tuber transplants are necessary. Get a new bush in several ways. The nuances of each of the processes are described in detail below.
Preliminary procedures
Before planting, you must carefully prepare the soil and choose which pot is best to plant gloxinia.
Pot selection
For this plant suitable containers of any material. Gloxinia does not require a large container. You need to focus on the size of the tuber, and the diameter of the pot should not exceed it by more than 5-6 cm. Too large a pot will provoke a buildup of green mass and roots, and flowering will occur much later.  On average, young plants will suit pots with a diameter of 7-9 cm, and 11-15 cm will be sufficient for adult specimens. The planting depth is small and the lower part of the pot is filled with drainage, so you can take a relatively low capacity.
Soil selection and preparation
The main requirements for the soil are as follows:
- nutrition;
- friability and lightness;
- moisture and breathability.
Did you know? Gloxinia belongs to non-poisonous plants and is safe for children and pets.
The following formulations are recommended for self-preparation:
- on one part of turf and leaf land, humus and river sand;
- three parts of leafy land and peat on two parts of river sand.

Drainage
Gloxinia does not like waterlogging, which can lead to rotting tubers. The drainage layer will provide protection against possible overflow.
At the bottom of the pot put a layer of such materials (optional):
- expanded clay;
- clay shards;
- pieces of foam.
Learn more about the care of the gloxinia flower at home.
How to plant gloxinia
Assumed several options for planting the considered plants. At the same time planting seeds are used mainly in breeding or for special varieties, and the easiest way to get a new flower from the leaf.
Tuber
Gloxinia needs an annual tuber transplant after a dormant period. The signal for transplanting will be sprouting sprouts on top of what happens in early spring. 
Tuber preparation consists of the following steps:
- Removing the tuber, pruning old roots and washing with water. Rotted or damaged should be cut with a clean blade and powdered with coal powder.
- For prevention, you can put the tuber for 30 minutes in the solution of "Fitosporina". Before planting, it must be dried within 24 hours.
- A healthy tuber should be firm and smooth, resembling potatoes. To return the hardness to a flabby specimen, it is required to lower it into wet sand or vermiculite for 3 days.
Important! When planting you need to make sure to plant the tuber sprouts up. If the tuber is not awake, they are oriented towards a dimple in the upper part, while the underside will always be smooth.
Landing is carried out in the following way:
- It is important to know how deep the tuber should be planted. It is placed in a pot and covered with soil by two thirds, leaving the top open.
- Moisturize the soil, avoiding direct moisture on the tuber.
- The container is closed with a transparent bag or a glass cap, forming a kind of greenhouse, and placed in a lighted warm place.
- Once a day, the pot is ventilated for 20 minutes.
Video: how to plant gloxinia tuber
When gloxinia forms the first pair of leaves, the shelter is worn only for the night, and after 5 days the plants may be open around the clock. At the same time, fill the ground so that the tuber was covered with a layer of at least 1 cm.
Seeds
Gloxinia seeds are quite small. They are sown with sand in small containers or plastic containers. If you have additional lighting for seedlings, you can start sowing in November, but the standard sowing period is January, February or March. Some breeders perform seedbed seed treatment, soaking them in growth stimulant solutions, according to the instructions.
Did you know? To obtain seeds, gloxinia is pollinated with a brush, transferring pollen from stamens to a pistil. For each grade, use a separate brush to not get an unwanted hybrid.
Seeds mixed with sand are sown as follows:
- The soil in the container must be moistened in advance.
- The seeds distributed over the ground surface are pressed down.
- Planting covered with clear glass or film and placed in a lighted place.
The optimum temperature for germination is + 24 ° C (not below + 18 ° C). In such conditions, the first shoots may appear within a couple of weeks, in others it may take almost a month. Sowing must be aired every day for 30 minutes. Gentle shoots moistened with drip irrigation or through the pan. When 2 leaves are formed on sprouts, they pick a 2 × 2 cm pattern, and transplant into separate pots with a diameter of 6 cm after 2 true leaves appear.
The optimum temperature for young seedlings at the pick stage is + 20 ° C. The next transplant is carried out in 3 months, and flowering can begin in 4-5 months. The first buds of young gloxinia grown from seeds should be removed. You can leave one bud to see the flower variety. In the first year, the plant does not need a period of rest, and in the spring it is only cut off, leaving a couple of leaves.
Video: how to grow gloxinia from seeds
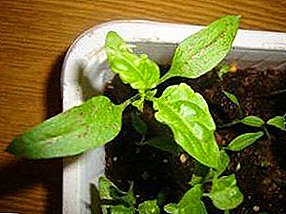
Leaf
If the variety allows, planting is the most convenient breeding method. Some varieties, such as Tigrina Pink, have a leaf that is prone to rapid decay in water. Leaf multiplication is practiced in the summer period (June - July). Faster roots are formed on small leaves, so large ones are often divided into parts. An incision is made parallel to the transverse veins with a sharp instrument. Not only petioles can take root, but also parts of leaf plates.
Read also about the features of the care and reproduction of gloxinia at home.
The sequence of work is as follows:
- The leaf is cut with a petiole and placed in a container with water, then waiting for the formation of roots.
- A leaf with a root is planted in the prepared soil and covered with a glass jar, without touching the edges of the sheet plate. You can plant a sheet in a mini-greenhouse. Plants are left in a lighted and warm place.
- The optimal irrigation mode is through the pallet, in this case the tuber is formed faster.
- After the appearance of new leaves, the greenhouse is regularly aired, and when the fourth pair of leaves grows, gloxinia is removed from the greenhouse.
Video: how to plant Gloxinia leaf
Further care
Gloxinia - a plant with a pronounced period of rest, and its cultivation involves the fulfillment of certain conditions.
Accommodation
The flower under consideration requires bright diffused light and daylight for 12-14 hours. A sign of the sufficiency of light is the horizontal direction of the leaves, and if the leaves and the stem are pulled up, then they lack light.
You will be interested to learn how to care for gloxinia after flowering.
At the same time, direct sunlight can cause spots and burns on the leaves. The optimal place for gloxinia will be the southern window with shading in the first part of the growing season, and after the beginning of flowering the pot can be moved to the east or west window sill.
In the presence of additional lighting special lamps in the 50 W gloxinia can be placed anywhere. The plant is sensitive to drafts, but does not like air stagnation. When airing, it is recommended to clean the pot, and then return it to the window sill with the window closed. 
Air temperature and humidity
The temperature during the period of growth can be room temperature, and during the period of rest it is necessary to maintain coolness (about + 10 ° C). Humidity should be in the range of 50-70%, in a dry room, twisting of leaves is possible. If it is necessary to increase the humidity of the air, you can place trays with wet moss or expanded clay around the pot, spray air.
Important! Water should not get on the pubescent leaves of gloxinia when spraying or watering. The plant can not be washed, and can only be cleaned with a soft and dry brush.
Watering
When moistening the plant, it is important to avoid overflow, as well as moisture on the outlet and the deepening of the tuber. It is also necessary to ensure the moisture content of the entire soil, since the lack of moisture in a part of the roots will lead to their death and further damage to the tuber. Watering can be carried out through the pan or on the edge of the pot.  It is important to wait for the upper layer to dry out, so watering in the fall and on cold days will be less frequent than in summer. Optimal use of rainwater, filtered water or settled during the day water. Its temperature should be 2-3 ° C above room temperature. After half an hour, the excess water from the pan is drained.
Top dressing
The first feeding is carried out 2 months after transplantation. Every 2 weeks they apply liquid mineral or organic fertilizers 1 hour after watering in the evening. It is convenient to use ready-sweep for indoor plants, for example, "Mikom". At the beginning of growth, the plant needs nitrogen supplements ("Uniflor-growth"), and after the appearance of the third pair of leaves - phosphorus ("Uniflor-flower"). Top dressing is stopped before the onset of a dormant period, making the last phosphate fertilizers 2 times after flowering.
Important! Gloxinia does not bloom with an excess of nitrogen: in this case, the buds rot and there is also poor rooting of the cuttings.
Rest period
The dormant period comes in the fall, when the air temperature decreases and the number of waterings decreases. Gloxinia ottsvetat, its leaves dry up, and then all ground part dies, and the tuber "falls asleep".
Tuber storage is possible in the following ways:
- transfer the pot for 3-4 months in a dark place at a temperature of + 10 ... + 15 ° C with periodic moistening. This method is suitable for large tubers, and small ones risk drying out and dying;
- Small tubers are dug out 2 weeks after the withering of the rosette and placed in a bag with wet sand, moss or vermiculite with the substrate, and then stored in the lower compartment of the refrigerator at + 5 ° C. So you can avoid drying out and constantly monitor the germination of specimens.
 Gloxinia is a flowering indoor plant, for the successful cultivation of which exact planting conditions and annual transplantation are necessary. The implementation of these recommendations allows you to get a long and abundant flowering of gloxinia.