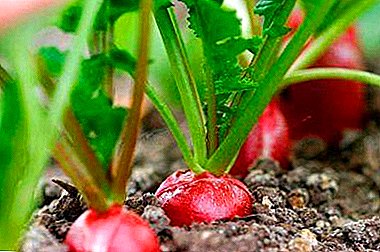
After a cold winter, the human body needs to replenish the reserve of vitamins and microelements. The beginning of spring is marked by the appearance of first greens and early vegetables. Among them - radishes. It contains: fiber, fats, B1, PP, B2, C, proteins, iron, sodium salts, phosphorus, calcium. Another advantage of radish is easy to grow even for beginners. Vegetable unpretentious and not particularly picky. Consider in the article whether it is possible to grow it through seedlings, what temperature conditions will be needed for growing, when to sow and how to do it, as well as how to care for radish in the future and what pests and diseases may threaten it.
Is it possible to grow radishes through shoots?
Growing radishes through seedlings is used to get the first harvest before. Despite the resistance of radish to cold weather, it will grow faster in light and nutritious soil with the necessary amount of light, when already germinated grains are transferred to open soil. And when sowing a vegetable in open ground, one has to wait for the shoots not earlier than in 14 days.
The process is easy to speed up. It is necessary to germinate seeds in advance and plant seedlings already in the soil. Radish prefers fertile soil. For seedlings, choose a soil that passes moisture and air fertilized with minerals and organic matter.
What should be the optimum temperature?
This vegetable is resistant to frost. However, at low temperatures, seeds will germinate more slowly. Seed material germinates perfectly, according to experienced gardeners, with 18 heat. When the radish began to give mass shoots, the temperature must be reduced to 8 degrees. Otherwise, the seedlings will begin to stretch.
After 4 days and before harvesting, the room is heated during the day to 20, and at night to 10 heat. Although the vegetable is cold-resistant, but at 5 degrees of frost the shoots will die.
When to sow?
Radish seedlings planted in two stages:
- Starting from February to April.
- Starting from August to the beginning of October.
Sowing is complicated only by the insufficient amount of sunlight needed by the vegetable for good growth.
Step by step instructions: how to plant in the usual way?
Buying seeds
 First you need to decide on the sowing material and variety. For planting radishes for seedlings, choose varieties that are resistant to poor lighting, lack of moisture and ripen quickly:
- "18 days";
- "Early Red";
- "Quart";
- Zarya;
- "Greenhouse mushroom".
To buy seeds, choose a reputable store that works directly with the manufacturer.
Seeds must be last year's harvest. Do not use biennial seeds and older. There is a high probability that germination will be scarce, and the shoots will go into blooming arrows, and not fruit.
Important! Thanks to modern telecommunications in Moscow and St. Petersburg, you can buy radish seeds, without leaving home, in one click of the mouse. The average price in both regions ranges from 20 to 25 rubles per package weighing 1 g.
Material preparation
It is better to buy seeds that have passed the coating process - treated with fertilizers and fungicides. This will favorably affect the germination and growth of seedlings at the initial stage. The shell should choose a bright:
- green
- red;
- orange.
When using a simple seed, coarse fractions of 1 to 2 mm in diameter are preferred. These seeds will later give a full harvest.
Calibration
Purchased seeds need to sort:
- Method of calibration to choose the largest grain.
- Then prepare a solution - 50 g of salt per 1 liter of water.
- Place the selected grains there, and stirring occasionally, hold them for 15 minutes.
- Viable seeds will settle to the bottom. Soothers will float. They are removed, as these grains will not germinate.
Disinfection
To protect the seedlings from pests and diseases, seeds are planted before planting.:
- The oven is heated to 60 degrees and sent to it a baking sheet with radish grains for 15 minutes.
- On the baking sheet pre-pack parchment. Seeds are distributed so that they do not come into contact with each other.
Also make a 1% solution of manganese (250 ml of liquid and 1 g of magnesium permanganate). The seeds are placed in it for 20 minutes, then washed under running water. These manipulations significantly increase the plant immunity.
Quenching
 For hardening use 2 options.
- Seed material for 24 hours immersed in cold water. Every 4 it is changed.
- You can also put the grain in a container and fill it with water. Place the container in the refrigerator overnight and leave it at room temperature during the day.
You can also check the seeds for germination:
- Gauze is placed on a saucer, pre-moistened, seeds are laid out on it and covered with a second piece of gauze on top.
- Once again moisturize and leave in a warm place. Good seed will sprout in large quantities the very next day.
After all the manipulations proceed to landing.
Landing
For comfort radish seeds are planted in disposable cups, by the method of a snail or cardboard egg boxes. The seedlings are tender and fragile, so it is easy to damage when transferred to open ground.
Using the above containers, seedlings when they reach a certain size, are planted together with the soil on open soil. The ground should be well loosened for a better exchange of moisture and oxygen. It is best to fertilize with rotting compost, peat or ash. It is not recommended to use manure. This fertilizer can burn the seeds.
Prepared containers with ground must be moistened. Lay the seeds should be at a depth of not more than 1.5 cm. Then cover with soil and a little tamp.
Important! Soaked seeds in advance for 15 minutes will sprout the next day. Dry seed will sprout after 4 days.
We invite you to watch a video about planting radish in egg cassettes:
Aftercare
 Moisten the soil properly 1 time in 2 days. Watering should be abundant. After a drought, radishes will not produce good fruits, but will begin to bloom. When the vegetable gives the first true leaf - this is a signal to transplant into open ground. But is it possible to transplant radish in open ground? Yes, if by this time the weather is already warm outside. Despite the frost resistance, strong morning frosts can destroy the radish.
For planting in open ground sunny sunny day will do. The plot is chosen quite lit, without shadow. Cut the beds can be flat-cut or ordinary sap. The soil must be fertilized.
Also the best forerunners of radish are considered:
- potatoes;
- zucchini;
- pumpkin;
- cucumbers;
- beans;
- peas.
You can not plant seedlings on areas where cruciferous cultures used to grow. After them in the soil remain pests that can destroy seedlings.
Step-by-step instructions for using the snail method
To grow seedlings, use the method of the cochlea. First you need to prepare an unusual capacity for seedlings using such materials.:
- Transparent container for snails.
- Tweezers.
- The soil.
- Seed material.
- Substrate. Strip up to 1.5 meters long and 10 cm wide with good porosity, impermeable to moisture.
- Plastic bag.
- 3 rubber bands.
To seed germinated without problems, should:
- Soak the seed in warm water for 15 minutes. Seeds also harden, keeping the day in cold water, which should be replaced every 4 hours.
- Feed seed. Dissolve trace elements in the liquid, and put seeds in it for half a day.
- Disinfect the grain. To do this, use garlic water (per 100 ml of 20 g of extruded garlic) or manganese 1% solution.
Armed with all the materials, proceed to the formation of the snail:
 Prepare a comfortable work space.
- Spread the entire length of the tape with one end facing you. It is advisable to put this end on spacing.
- Pre-moistened primer, to avoid spilling, it is necessary to lay on the tape a layer of not more than 1 cm, slightly tamping. It is not necessary to fill the entire strip with soil at once. In the first pair, only 20 cm is enough.
- We begin to gently spread the seeds on the finished plot with tweezers, departing from any of the edges of 2 cm. Put the seeds in 2 cm intervals from each other. Seed material should be slightly deepened with your fingers into the soil, so that with further manipulations it does not fall out.
- Filling the tape completely with soil and seeds, we twist the snail, gradually wrapping the strip into a roll.
- On the finished snail we wear 2 elastic bands on top and bottom, so that it does not unwind.
- Turn the snail around so that the seeds are closer to this edge, and put the showered earth back into place, so that it sticks out a little from the snail.
- We put the snail in the prepared and suitable in volume capacity.
- It is necessary to moisten each layer of the cochlea. Lack of moisture affects seed germination.
- To obtain the effect of a greenhouse, a package is put on the snail and secured with an elastic band.
After the first shoots, polyethylene is removed and the first real seedling leaves are waiting for transplanting to the ground.
Not always seedlings grow equally large and strong. It is not necessary to remove weak growths. They can be given to grow:
- Carefully unwind the snail.
- Choose strong shoots for transplanting in open soil, and leave weak ones. Due to the sustained distance between the seeds when planting, strong shoots are easy to separate without damaging the root system of adjacent shoots.
- Then the snail is twisted again and sent into place before the weak seedlings become large and strong.
We offer you to watch a video about planting radish using the snail method:
What if the shoots stretched out, and why does this happen?
Often gardeners are faced with the problem of pulling out seedlings when the shoots do not form real leaves, but stretch upwards. There are several reasons for this vegetable behavior:
- too high temperatures;
- soil deficiency;
- lack of sufficient light.
Even if this situation happened, do not despair. If the room temperature is too high, it should be lowered. Seedling growth will slow down a bit, but it will not stretch. If the matter is a lack of soil, you need to carefully lay the stem and sprinkle it with sifted soil right up to the leaves. In the absence of light, seedlings should be placed where it will be more.
Diseases and pests during cultivation
 The cross-shaped flea is considered the most dangerous for seedlings. This insect resembles an ordinary flea and is capable of jumping over distances up to 50 cm. The pest is especially dangerous during drought. So, in a few days he eats up the leaves of the seedlings and is able to completely destroy them.
You can not fight with flea chemistry. Radish is a fast-ripening vegetable. Chemical elements do not have time to completely decompose and together with the roots get on the table. The most effective method is the treatment of seedlings with wood ash mixed with tobacco dust. To do this, take on one part 2 components, mix and pollinate the prepared mixture of seedlings. Manipulation is carried out up to 3 times every 4 days. This method will save radishes from other pests:
- whiteflies;
- cabbage fly;
- thrips.
Also radish predisposed:
- downy mildew;
- mucous bacteriosis;
- black leg and keel.
That is why it is impossible to plant radishes in places where cabbage has grown before.
Unpretentious care, rapid growth makes radish a true favorite of gardeners. It is only necessary to choose the right grade, planting time, following all recommendations. And then the provision of an excellent harvest of spring, juicy and healthy vegetables is guaranteed.


 Prepare a comfortable work space.

